Creating an API tool
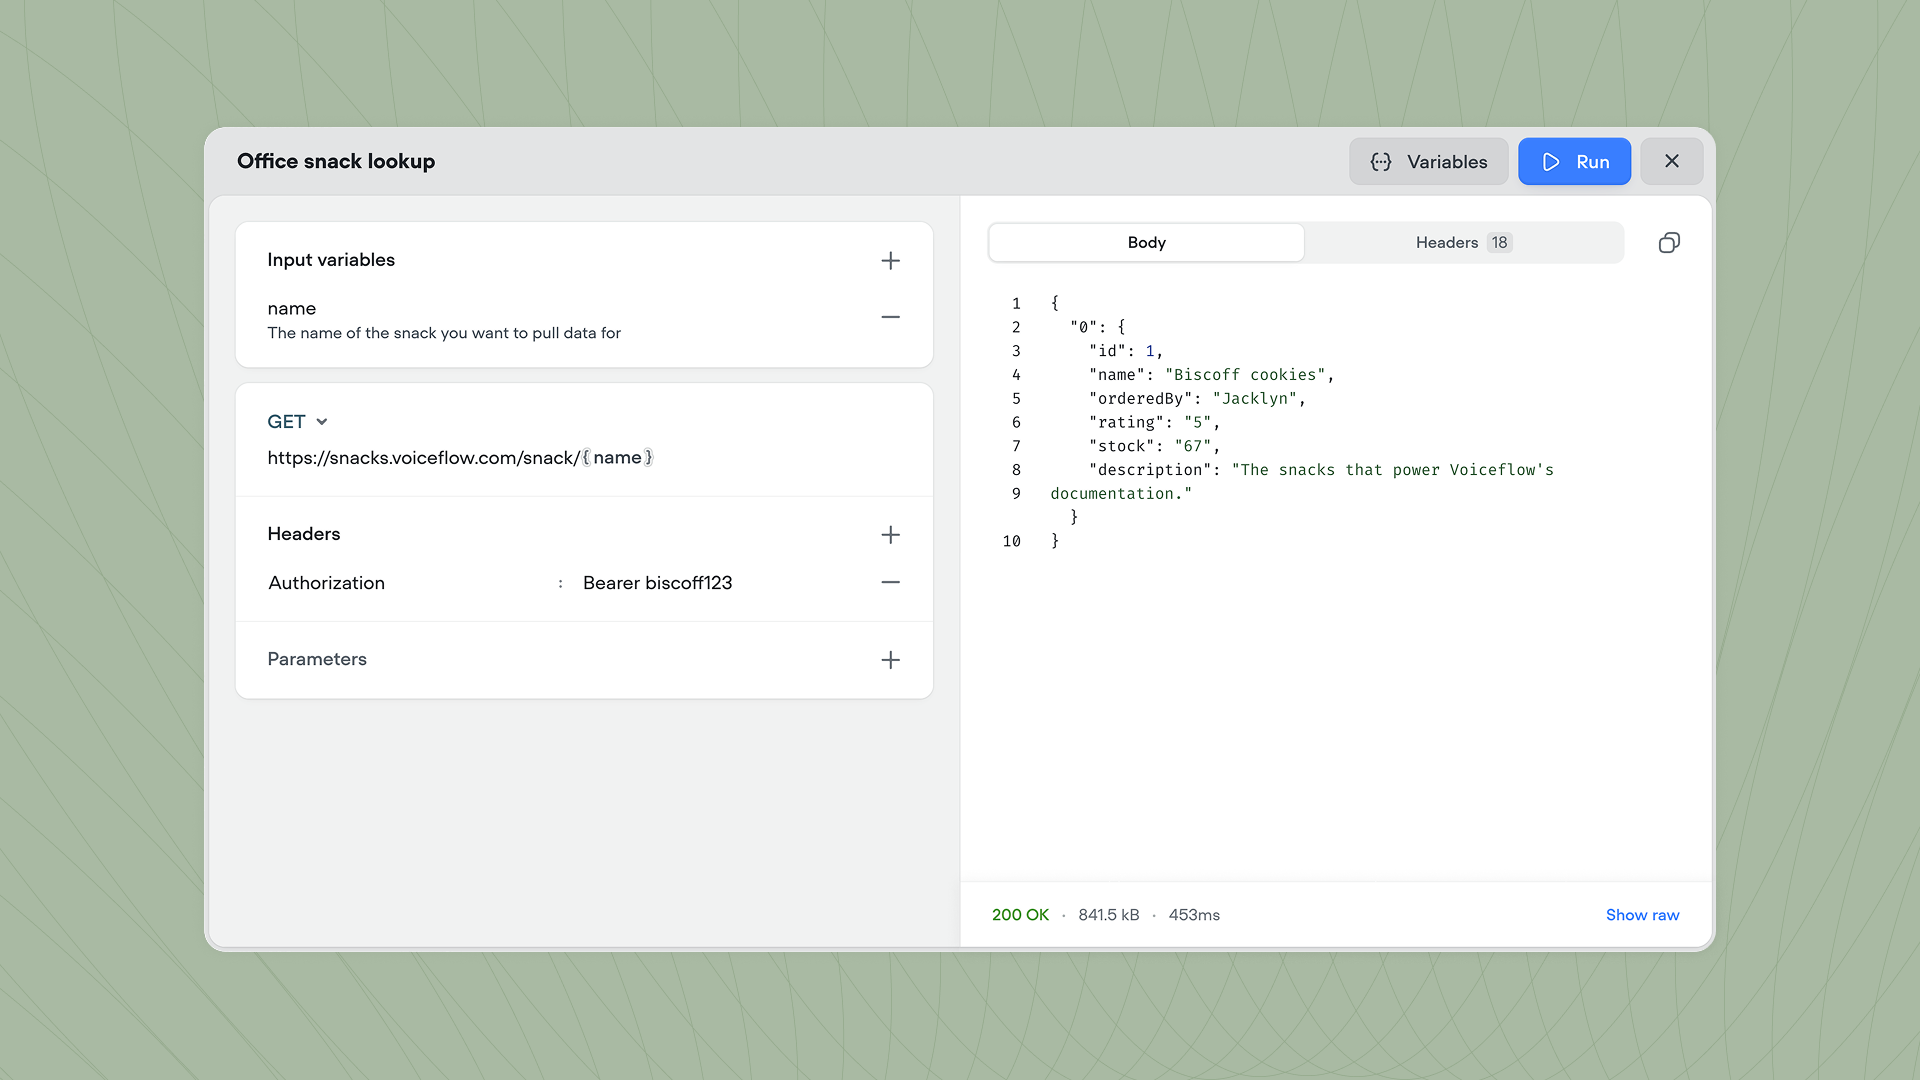
Create a new API tool from Tools → New tool → API call, or click API → Create API tool directly from a Playbook’s tool panel. Once created, you can call the API tool from inside a Playbook or Workflow using the API step.Configuring the request
Each API tool defines a single HTTP request with the following options:- Method: The HTTP method to use (
GET,POST,PUT,PATCH, orDELETE). - URL: The endpoint to call. You can include variables in the URL using curly braces (eg:
https://api.example.com/users/{user_id}). - Headers: Key-value pairs sent with the request, such as
AuthorizationorContent-Type. Click the + button to add additional headers. - Parameters: Query parameters appended to the URL. Click the + button to add additional parameters.
- Body: The request body for
POST,PUT, andPATCHrequests. Choose from three formats:- Form data: Send key-value pairs as multipart form data.
- URL encoded: Send key-value pairs as URL-encoded form data.
- Raw: Send a raw body, such as JSON.
Input variables
You can optionally provide input variables that can be passed into the request. These variables can be passed in by a Playbook or a API step and are usable in the URL, headers, or parameters by wrapping them in curly braces. For each input variable, you can optionally add a description.Testing the API tool
Click Run in the top right corner of the API tool editor to test your API call. Click Variables to enter test values for your input variables, then click Run to execute the request. The response panel displays the JSON response body along with the status code, response size, and response time (eg:200 OK · 11.3 kB · 354ms). Click Show raw to see the unformatted response, or use the Headers tab to inspect the response headers.